
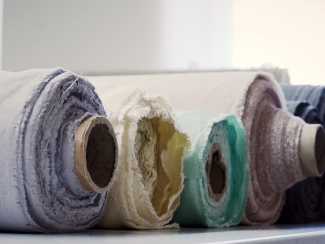
Sewing with Linen: 10 Practical Tips for Better Results
Updated August 10, 2026
Linen is rewarding to sew: it presses well, has visible grain and produces garments and home textiles with character. It can also fray, shift or grow if handled carelessly. These ten steps cover preparation through finishing so the fabric’s natural texture remains an advantage rather than a surprise.
1. Choose linen for the project
Match fabric weight and drape to the pattern. Lightweight linen suits loose tops and linings; medium weights work for dresses, shirts and table linen; heavier cloth is better for bags, cushions and structured interiors. Order a sample and test opacity, recovery and hand before committing.
2. Prewash and press
Prewash using the method you expect to use later because linen may shrink. Finish raw cut edges first if fraying is severe. Dry gently, then press while slightly damp. Record the sample’s dimensions before and after washing if exact sizing matters.
3. Find the grain and cut accurately
Square the fabric by following a visible thread or carefully pulling one thread across the width. Let the cloth relax on the cutting surface, use sharp shears or a rotary cutter and hold layers with fine pins or pattern weights. Avoid stretching bias edges.
4. Stabilise before stitching
Staystitch necklines, armholes and other curves. Test needle size, thread and stitch length on a folded scrap. A fresh universal or sharp needle around size 70/10 to 90/14 suits many linens, but the test result matters more than a fixed rule.
5. Sew steady seams
Use good polyester or cotton-wrapped polyester thread and a moderate straight stitch. Do not pull the fabric behind the presser foot. If seams pucker, rethread, reduce tension gradually and retest rather than pressing the distortion flat.
6. Plan for fraying
Finish seams with an overlocker, zigzag, bound edge or French seam appropriate to the fabric and project. Finish promptly after cutting. Wider seam allowances give loose weaves more security.
7. Press as you go
Press each seam before crossing it with another. Use steam and a pressing cloth, and test temperature first. Lift and lower the iron instead of dragging it, which can distort the grain.
8. Support closures and hems
Add lightweight interfacing at buttonholes, zips and pocket openings when needed. Let garments hang before marking a bias or flared hem. A double-fold hem works well on many home textiles.
9. Use scraps as tests
Test topstitching, buttonholes, seam finishes and wash behaviour on offcuts. This is also the safest place to evaluate washable markers and stain-removal methods.
10. Finish, wash and evaluate
Trim loose threads, inspect stress points and give the completed piece a gentle wash if appropriate. Note what worked for the next project; linen softens, so final drape can differ from the newly sewn result.
Frequently asked questions
Is linen difficult for beginners to sew?
Stable medium-weight linen is often beginner-friendly, especially after prewashing and careful grain alignment.
What needle should I use for linen?
A fresh universal or sharp needle commonly works; choose the size after testing on the actual fabric weight.
How do I stop linen seams fraying?
Finish raw edges with an overlocker, zigzag, binding or enclosed seam and allow adequate seam width.